As a homeowner in Kansas City, you understand the unique challenges our Midwest climate presents to exterior surfaces. From scorching summer heat to harsh winter freeze-thaw cycles, your home's exterior takes a beating year-round. When it's time to refresh your property with a new coat of paint, proper preparation isn't just recommended—it's absolutely essential for achieving professional results that will withstand Kansas City's unpredictable weather patterns.
Whether you're planning a DIY project or preparing for professional painters, understanding the critical preparation steps will help ensure your investment delivers maximum value and longevity. At KC Painting, we've seen firsthand how proper preparation can make the difference between a paint job that lasts three years versus one that protects your home for a decade or more.
Why Exterior Preparation is Critical in Kansas City's Climate
Kansas City's continental climate creates unique challenges for exterior paint. Our region experiences temperature swings of over 100 degrees throughout the year, with humid summers reaching the 90s and bitter winters dropping below zero. These extreme conditions, combined with frequent storms and high winds, create the perfect recipe for paint failure if surfaces aren't properly prepared.
The freeze-thaw cycles common in our area cause wood to expand and contract repeatedly, while summer humidity can prevent proper paint adhesion if surfaces aren't completely clean and dry. Additionally, Kansas City's clay soil retains moisture, which can lead to increased humidity around your home's foundation and lower siding.
Proper preparation addresses these regional challenges by ensuring paint adheres correctly, creating a barrier that flexes with temperature changes and resists moisture infiltration. Skipping preparation steps might save time initially, but it often results in peeling, cracking, and premature paint failure that requires costly touch-ups or complete repainting within a few years.
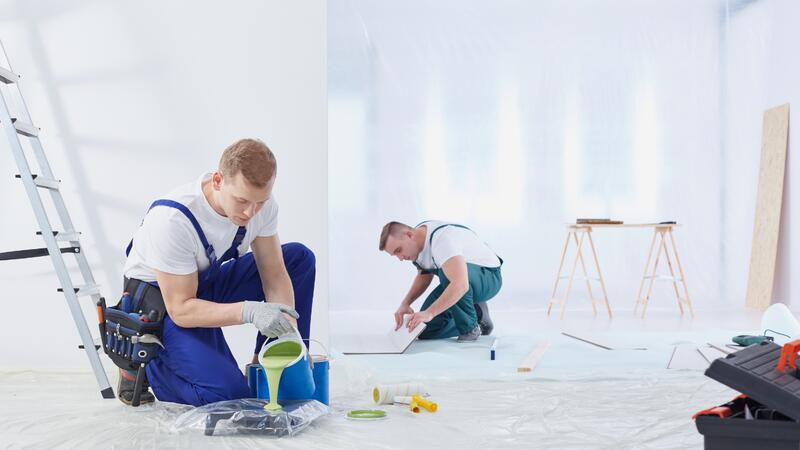
Essential Tools and Materials for Exterior Paint Preparation
Before diving into the preparation process, gathering the right tools and materials will make your project more efficient and professional. Here's what you'll need for a thorough exterior paint preparation:
Cleaning Equipment
- Pressure washer (2,500-3,000 PSI recommended)
- Garden hose with spray nozzle
- Stiff-bristled brushes (various sizes)
- Scrub brushes and cleaning cloths
- Bucket for cleaning solutions
- Mild detergent or specialized house cleaner
Surface Preparation Tools
- Paint scrapers (both handheld and long-handled)
- Wire brushes for rust removal
- Sandpaper (80-grit through 220-grit)
- Electric sander for large areas
- Putty knives for filling holes
- Caulk gun and exterior-grade caulk
- Wood filler or exterior patching compound
Protection and Safety Equipment
- Drop cloths (canvas or heavy plastic)
- Painter's tape (high-quality exterior grade)
- Plastic sheeting for protecting plants and fixtures
- Safety goggles and dust masks
- Work gloves
- Ladder or scaffolding system
Priming and Painting Supplies
- High-quality exterior primer
- Exterior paint suitable for your siding material
- Brushes and rollers appropriate for your surface texture
- Paint trays and liners
Investing in quality tools pays dividends in both efficiency and final results. Professional-grade equipment may cost more upfront, but it typically performs better and lasts longer than budget alternatives.
Step-by-Step Exterior Cleaning Process
Cleaning your home's exterior is the foundation of proper paint preparation. In Kansas City's dusty environment, surfaces accumulate significant dirt, pollen, and organic growth that must be completely removed for paint to adhere properly.
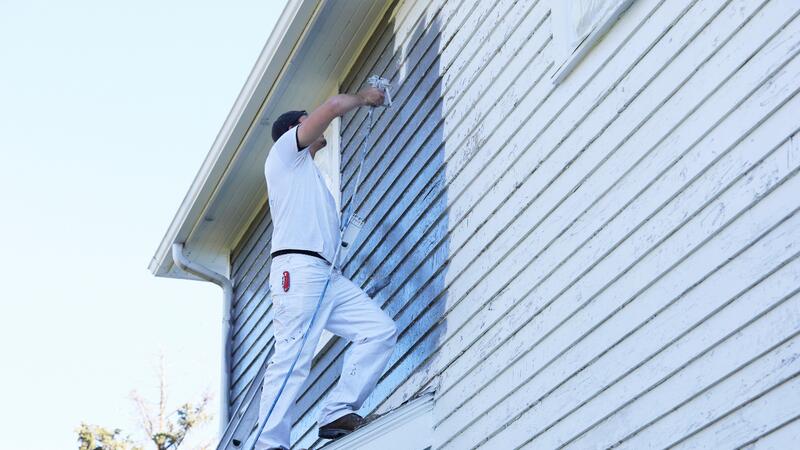
Power Washing Technique
Start your cleaning process with a thorough power washing. Use a pressure washer with 2,500-3,000 PSI, which provides enough force to remove stubborn dirt without damaging most siding materials. Begin at the top of your home and work downward, maintaining a consistent distance of 12-18 inches from the surface.
Pay special attention to areas under eaves and overhangs where dirt and spider webs accumulate. These protected areas often harbor moisture and organic growth that can interfere with paint adhesion. Use a slightly closer approach for heavily soiled areas, but be cautious around windows, trim, and delicate materials.
For homes with wood siding, be particularly careful with pressure settings. Excessive pressure can raise wood grain or drive water deep into the wood, creating moisture problems that interfere with painting. When in doubt, test the pressure on an inconspicuous area first.
Addressing Mold and Mildew
Kansas City's humid summers create ideal conditions for mold and mildew growth, particularly on north-facing walls and areas with poor air circulation. These organic growths not only create unsightly stains but can also continue growing under paint if not properly eliminated.
Create a cleaning solution using one part bleach to four parts water, adding a small amount of dish soap for better coverage. Apply this solution to affected areas and allow it to sit for 10-15 minutes before scrubbing with a stiff brush. Rinse thoroughly with clean water and allow the surface to dry completely before proceeding.
For severe mold or mildew problems, consider using specialized antimicrobial cleaners designed for exterior surfaces. These products often provide longer-lasting protection and may be more effective than bleach solutions.
Cleaning Timeline and Drying
Allow at least 24-48 hours for surfaces to dry completely after power washing, depending on weather conditions. Kansas City's humidity can extend drying times, particularly in shaded areas or during cooler months. Surfaces must be completely dry before applying primer or paint to ensure proper adhesion.
Schedule your cleaning process to coincide with several days of dry weather. Avoid cleaning immediately before predicted rain, as moisture can re-contaminate cleaned surfaces and extend drying times significantly.
Surface Inspection and Damage Assessment
Once your home is clean and dry, conduct a thorough inspection to identify areas requiring repair before painting. This systematic approach ensures you address all issues that could compromise your paint job's longevity.
Wood Siding Inspection
Examine wood siding boards for signs of rot, splitting, or loose boards. Pay particular attention to areas near ground level, around windows and doors, and anywhere wood contacts dissimilar materials. Use a screwdriver or awl to test suspicious areas—sound wood should resist penetration, while rotted wood will feel soft or spongy.
Check for loose or missing caulk around trim, windows, and joints. Kansas City's temperature extremes cause significant expansion and contraction, which commonly leads to caulk failure. Even small gaps can allow moisture infiltration that leads to paint problems and structural damage.
Inspect for loose or popped nails, particularly in older homes with traditional wood siding. These create small holes that collect moisture and can cause staining or rust marks that bleed through paint.
Vinyl and Aluminum Siding Considerations
While vinyl and aluminum siding require less preparation than wood, they still need thorough inspection. Look for loose panels, dents, or areas where caulk has failed. Vinyl siding can become brittle in cold weather and may have developed cracks that need attention.
For aluminum siding, check for oxidation or chalking, which appears as a white, powdery residue. This must be completely removed before painting, as it prevents proper paint adhesion. Areas with significant oxidation may require special primers designed for metal surfaces.
Trim and Detail Work Assessment
Window and door trim typically require the most attention during preparation. These areas experience the most weather exposure and often show the first signs of paint failure. Check for loose or missing glazing compound around windows, damaged or rotted trim pieces, and areas where different materials meet.
Examine decorative elements like shutters, columns, and architectural details. These features often have multiple surfaces and angles that collect dirt and moisture, requiring extra attention during preparation.
Scraping and Sanding Techniques
Removing loose or failing paint is crucial for a long-lasting paint job. Kansas City's weather extremes accelerate paint failure, making thorough scraping and sanding essential steps in the preparation process.
Paint Removal Strategy
Start with areas showing obvious paint failure—peeling, cracking, or chalking paint that comes off easily when touched. Use a sharp paint scraper to remove loose material, working systematically across the surface. Hold the scraper at a consistent angle and use smooth, controlled strokes to avoid gouging the underlying material.
For extensive paint removal, consider renting or purchasing an electric paint remover. These tools use heated air to soften paint, making removal easier and more efficient than scraping alone. However, exercise caution around windows and trim, as excessive heat can damage glass or delicate materials.
Sanding for Smooth Transitions
After scraping, sand the edges where old paint meets bare material to create smooth transitions. This step is critical for achieving a professional appearance, as even small ridges or rough edges will be visible through the new paint.
Use 80-grit sandpaper for initial smoothing of rough areas, followed by 120-grit for final preparation. For large areas, an electric sander significantly speeds the process, but be careful not to over-sand, which can create depressions or remove too much material.
Lead Paint Considerations
Homes built before 1978 may contain lead paint, which requires special handling procedures. If you suspect lead paint, contact a certified professional for testing and proper removal. DIY removal of lead paint can create serious health hazards and may violate local regulations.
Kansas City has specific ordinances regarding lead paint removal, and improper handling can result in significant fines. When in doubt, consult with professionals who have the proper training and equipment to handle lead paint safely.
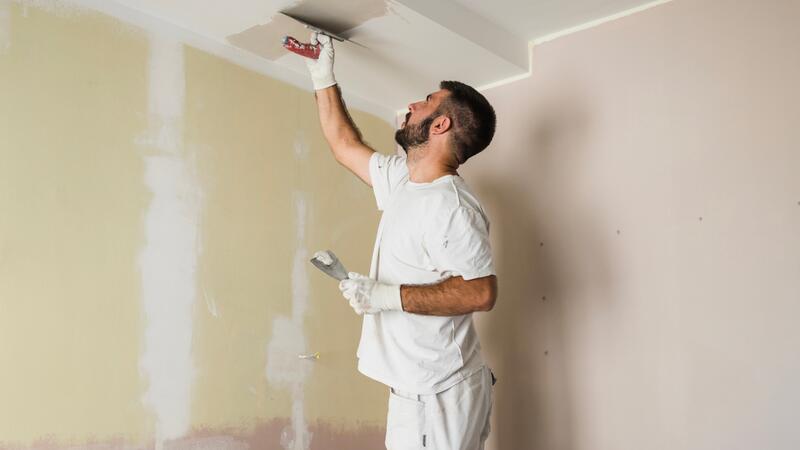
Repairs and Patching
After cleaning and scraping, address all identified damage before priming and painting. Proper repairs ensure your paint job looks professional and provides maximum protection for your home.
Wood Repair Techniques
For minor wood damage, use high-quality exterior wood filler to patch holes, dents, and small areas of rot. Apply the filler slightly proud of the surrounding surface, as most fillers shrink slightly as they cure. Once dry, sand smooth and prime before painting.
Larger damaged areas may require replacement of entire boards or sections. When replacing wood, choose materials that match the existing siding in thickness and profile. Allow new wood to acclimate to local humidity conditions for several days before installation to minimize future movement.
Caulking and Sealing
Replace failed caulk around windows, doors, trim, and anywhere different materials meet. Remove old caulk completely using a caulk removal tool or sharp knife—new caulk won't adhere properly over old material.
Choose high-quality exterior caulk rated for your local climate conditions. In Kansas City, look for products that remain flexible in temperatures from -20°F to 120°F and resist UV degradation. Paintable acrylic latex caulks work well for most applications, while specialized sealants may be necessary for areas with significant movement or exposure.
Metal Surface Preparation
Treat any rust on metal surfaces like gutters, downspouts, or metal trim. Remove loose rust with wire brushes or sandpaper, then treat remaining rust with a rust-converting primer. These products chemically convert rust to a stable compound that provides a good foundation for paint.
For aluminum surfaces with significant oxidation, use specialized aluminum cleaners or fine steel wool to remove the chalky residue completely. Follow up with an appropriate metal primer designed for your specific material.
Priming: The Critical Foundation
Primer is often the most overlooked aspect of exterior painting, yet it's arguably the most important for long-term success. In Kansas City's challenging climate, primer provides essential adhesion, stain blocking, and surface uniformity that determines your paint job's ultimate performance.
Choosing the Right Primer
Select primer based on your surface material and local conditions. For wood siding, oil-based or high-quality acrylic primers provide excellent adhesion and stain blocking. Raw wood, in particular, benefits from oil-based primers that penetrate deeply and seal the surface effectively.
Metal surfaces require specialized primers designed for their specific material. Aluminum and galvanized steel need different primer formulations to ensure proper adhesion and prevent corrosion.
For previously painted surfaces in good condition, a high-quality bonding primer can often eliminate the need for extensive scraping while providing excellent adhesion for new paint.
Application Techniques
Apply primer during optimal weather conditions—temperatures between 50-85°F with low humidity and no precipitation forecast for 24 hours. Kansas City's rapid weather changes make timing crucial, so monitor forecasts carefully.
Use the same application method you'll use for the finish coat. If you plan to roll the final paint, roll the primer as well to ensure consistent texture. Pay special attention to end grain on wood surfaces, which absorbs primer readily and may require multiple coats for proper sealing.
Coverage and Drying
Don't skimp on primer coverage—thin coats won't provide adequate protection or hide underlying surface variations. Most primers require 24 hours to cure completely before topcoating, though some fast-dry formulations may be ready sooner in ideal conditions.
Inspect the primed surface carefully before proceeding to the finish coat. Any areas showing bleed-through, poor coverage, or other issues should be spot-primed before final painting.
Weather Considerations for Kansas City Painting Projects
Timing your exterior painting project around Kansas City's weather patterns significantly impacts both the preparation process and final results. Understanding local climate patterns helps you plan more effectively and achieve better outcomes.
Seasonal Planning
Late spring through early fall provides the best conditions for exterior painting in Kansas City. Plan major projects between April and October when temperatures are moderate and humidity levels are more manageable. However, avoid the peak summer months of July and August when temperatures often exceed 90°F and afternoon thunderstorms are common.
Fall offers excellent painting conditions with moderate temperatures and lower humidity, but watch for early frost dates that can affect paint curing. Spring weather can be unpredictable with frequent storms, but the moderate temperatures and lower humidity make it ideal when weather permits.
Daily Weather Monitoring
Check detailed weather forecasts before starting any painting phase. Avoid painting when rain is predicted within 24 hours, as moisture can prevent proper curing and cause significant problems. Wind speeds above 15 mph can also create challenges, particularly with spray application or when working with drop cloths and protective coverings.
Temperature swings common in Kansas City can affect paint application and curing. Avoid painting when temperatures will drop more than 20 degrees during the curing period, as this can cause adhesion problems and poor film formation.
Humidity and Dew Point Considerations
Kansas City's humidity levels significantly impact paint application and curing times. Avoid painting when relative humidity exceeds 85%, as this slows solvent evaporation and can prevent proper film formation. Morning dew is common in our area, so ensure surfaces are completely dry before beginning work each day.
Use a digital hygrometer to monitor humidity levels throughout your project. Professional painters often suspend work when humidity climbs too high, even if other conditions seem favorable.
Professional vs. DIY: Making the Right Choice
Deciding whether to tackle exterior preparation yourself or hire professionals depends on several factors specific to your situation and Kansas City's market conditions.
When to Consider DIY
DIY preparation makes sense for smaller projects, newer homes with minimal damage, and homeowners with adequate time and tools. Simple ranch-style homes with vinyl or aluminum siding often require less complex preparation that motivated homeowners can handle effectively.
However, consider the time investment realistically. Proper preparation typically takes 2-3 times longer than the actual painting, and Kansas City's weather can extend timelines significantly. What seems like a weekend project often stretches into weeks when weather delays and unforeseen issues arise.
Professional Advantages
Professional painters bring experience, efficiency, and specialized equipment that can make significant differences in both preparation quality and project timeline. They understand local weather patterns, have relationships with suppliers for quality materials, and carry insurance for potential property damage.
At KC Painting, we've seen numerous DIY projects that required professional intervention when homeowners encountered unexpected complications like extensive rot, lead paint, or structural issues that affected the painting process.
Cost Considerations
While DIY preparation saves labor costs, factor in tool rental or purchase, materials, and the value of your time. Professional preparation typically costs $2-4 per square foot in Kansas City, depending on the surface condition and complexity.
Consider also the warranty and insurance aspects—professional work typically includes guarantees and insurance coverage that protect your investment in ways DIY projects cannot.
Frequently Asked Questions
Q: How long should I wait after pressure washing before painting in Kansas City?
Allow at least 48-72 hours for complete drying after pressure washing, especially during Kansas City's humid summer months. Check that all surfaces feel completely dry to the touch, paying special attention to north-facing walls and shaded areas that dry more slowly. During periods of high humidity or cooler weather, extend the waiting period to ensure proper paint adhesion.
Q: What's the best time of year to paint exterior surfaces in Kansas City?
The optimal painting season in Kansas City runs from late April through early October, with May, June, September, and early October being ideal. Avoid the peak summer months of July and August when temperatures often exceed 90°F and afternoon storms are frequent. Fall provides excellent conditions with moderate temperatures and lower humidity, but watch for early frost warnings.
Q: Do I need to prime if I'm painting over existing paint?
Priming over existing paint depends on the current paint's condition and your color change plans. If the existing paint is in good condition with no peeling or chalking, and you're using a similar or darker color, high-quality paint may bond adequately without primer. However, for dramatic color changes, transitioning from oil to latex paint, or over surfaces with stains or damage, primer is essential for proper adhesion and coverage.
Q: How do I handle lead paint on my Kansas City home?
Homes built before 1978 likely contain lead paint, which requires special handling under EPA regulations. Kansas City has specific ordinances governing lead paint removal, and improper handling can result in significant fines and health hazards. If you suspect lead paint, hire certified professionals for testing and removal, or use lead-safe work practices if you qualify for DIY exemptions.
Q: What should I do if rain is forecast during my painting project?
If rain threatens during your painting project, protect all prepared surfaces and wait for completely dry conditions before resuming work. Remove any wet paint that hasn't cured properly, as it won't form a proper film. Kansas City's unpredictable weather makes flexible scheduling essential—have backup indoor projects ready and be prepared to adjust timelines based on forecasts.
Q: How much should I budget for exterior paint preparation in Kansas City?
Exterior paint preparation costs in Kansas City typically range from $2-6 per square foot, depending on surface condition, material type, and complexity. Homes requiring extensive scraping, repairs, or specialty treatments like lead paint removal cost more. Budget approximately 40-60% of your total painting budget for preparation work, as this foundation determines your project's long-term success.
Ready to Transform Your Kansas City Home?
Proper exterior paint preparation is an investment in your home's protection, appearance, and value. While the process requires time, effort, and attention to detail, the results speak for themselves in both immediate visual impact and long-term durability.
Whether you're planning a DIY project or considering professional services, understanding these preparation fundamentals helps ensure your exterior painting project succeeds in Kansas City's challenging climate. Remember that preparation work often determines the difference between a paint job that lasts three years versus one that protects and beautifies your home for a decade or more.
At KC Painting, we've spent years perfecting our exterior preparation techniques specifically for Kansas City's unique climate challenges. Our team understands the local weather patterns, common issues affecting homes in our area, and the most effective preparation methods for achieving lasting results. We use premium materials designed for our region's temperature extremes and humidity variations, ensuring your investment provides maximum value.
From thorough surface cleaning and damage assessment to professional repairs and proper priming, we handle every aspect of exterior preparation with the attention to detail that distinguishes professional results from amateur attempts. Our systematic approach addresses the unique challenges Kansas City homes face, from clay soil moisture issues to severe storm damage.
Don't let improper preparation compromise your exterior painting investment. Contact KC Painting today at (816) 281-7039 for a free, comprehensive estimate on your exterior painting project. We'll assess your home's specific needs, explain our preparation process, and provide a detailed timeline that works with Kansas City's weather patterns. Let our experience and expertise ensure your home's exterior not only looks beautiful but also withstands everything Kansas City's climate can deliver.
Your home deserves the protection and beauty that only proper preparation and professional application can provide. Call KC Painting at (816) 281-7039 and discover why Kansas City homeowners trust us for their most important exterior painting projects.