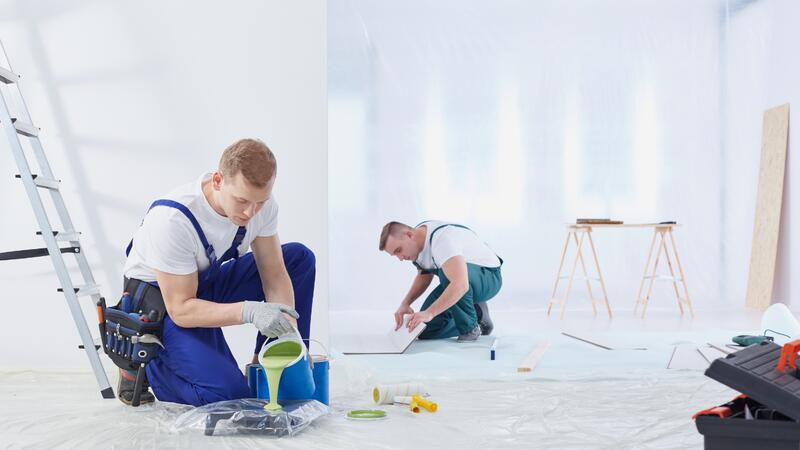
When you've made the decision to transform your home with a fresh coat of paint, you're embarking on one of the most impactful home improvement projects you can undertake. As a professional painting contractor serving Kansas City and the surrounding areas for over a decade, I've seen firsthand how proper preparation can make the difference between a mediocre paint job and one that truly transforms your space.
The success of any interior painting project doesn't just depend on the quality of paint or the skill of your painters—it starts with how well you prepare your room before the professionals arrive. Taking the time to properly prep your space not only ensures better results but can also save you time and money while protecting your valuable belongings.
Whether you're planning to refresh a single room or tackle your entire Kansas City home, understanding the preparation process will help you work more effectively with your painting contractors and achieve the stunning results you're envisioning. Let's walk through each essential step to ensure your painting project gets off to the perfect start.
Clear and Relocate All Furniture
The foundation of any successful painting project begins with creating an open, accessible workspace. This means removing or relocating all furniture and large items from the room that will be painted. While this might seem like a straightforward task, there's actually a strategic approach that can make this process much more efficient.
Complete Removal vs. Strategic Positioning
Ideally, you'll want to move all furniture completely out of the room. This approach provides painters with maximum access to walls, baseboards, and corners, ensuring no area is missed and eliminating the risk of paint splatters on your belongings. However, in Kansas City homes where space might be limited, complete removal isn't always practical.
If you can't remove everything, group remaining large furniture pieces in the center of the room. Leave at least four feet of clearance from all walls to give painters adequate working space. Cover these items with high-quality drop cloths or plastic sheeting, ensuring complete coverage from top to bottom.
Planning Your Furniture Storage
Before moving day arrives, identify where you'll temporarily store displaced furniture. Consider these options:
- Adjacent rooms: The most convenient option if you have adequate space
- Garage or basement: Ideal for items that won't be damaged by temperature fluctuations
- Outdoor storage: Only suitable for weather-resistant pieces and during favorable Kansas City weather conditions
- Temporary storage unit: Worth considering for extensive whole-house projects
Protecting Floors During the Move
As you relocate furniture, protect your floors from scratches and damage. Use furniture sliders, old blankets, or cardboard to create a protective barrier. This is especially important for hardwood floors common in many Kansas City homes built in the early to mid-20th century.
Remove All Wall Decorations and Hardware
Once furniture is handled, turn your attention to everything hanging on or attached to your walls. This step requires careful attention to detail and systematic organization to ensure nothing gets lost or damaged.
Taking Down Artwork and Decorations
Remove all pictures, mirrors, wall clocks, decorative shelving, and any other items mounted on walls. As you remove each piece, take photos of their original placement—this will make reinstallation much easier once the painting is complete.
Wrap fragile items in bubble wrap or soft cloths, paying special attention to:
- Picture frames with glass
- Mirrors
- Ceramic or porcelain decorative pieces
- Electronics like wall-mounted televisions
- Family heirlooms or valuable artwork
Organizing and Storing Small Items
Create a systematic approach to storing removed items. Use clearly labeled boxes or bins, grouping similar items together. Consider designating one box per room to keep things organized for easy reinstallation.
Hardware Removal Strategy
Remove or protect all hardware elements including:
- Light switch and outlet covers: Unscrew and store with their screws in small bags
- Curtain rods and brackets: These can interfere with painting and may get paint on them
- Hooks and small wall-mounted items: Remove completely or cover thoroughly
- Thermostats: Cover with painter's tape if they can't be removed
For hardware that can't be removed, high-quality painter's tape is essential. However, removal is always preferable for the best finish.
Protect Your Floors and Remaining Surfaces
Even though professional painters will bring their own drop cloths and protective materials, taking extra precautions to protect your floors and surfaces demonstrates good preparation and provides additional peace of mind.
Choosing the Right Floor Protection
Different flooring types require different protection strategies:
Hardwood floors: Use canvas drop cloths rather than plastic, which can be slippery and may trap moisture. Many Kansas City homes feature beautiful original hardwood that requires extra care.
Carpet: Heavy-duty plastic sheeting or specialized carpet protection film works well. Ensure the material breathes to prevent moisture buildup.
Tile or laminate: Either canvas or plastic works, but canvas provides better footing for painters.
Protecting Built-in Features
Many Kansas City homes feature beautiful built-in cabinets, bookcases, or other architectural elements that need protection:
- Cover built-ins with plastic sheeting, securing edges with painter's tape
- Protect mantlepieces and fireplace surrounds
- Shield stair railings and banisters in multi-level areas
- Cover light fixtures that can't be removed
HVAC Considerations
During Kansas City's varied seasons, your HVAC system will likely be running during the painting process. Cover air vents and returns with painter's tape and light plastic to prevent paint particles from entering your system while maintaining some airflow.
Address Necessary Cleaning Tasks
A clean surface is crucial for paint adhesion and a professional-looking finish. While professional painters will do final wall preparation, there are cleaning tasks you can handle beforehand to streamline the process.
Wall Cleaning Priorities
Focus your cleaning efforts on:
High-traffic areas: Hallways, stairwells, and rooms near entryways often accumulate more dirt and grime
Kitchen and bathroom walls: These areas typically have more grease, moisture, or residue that needs addressing
Areas around light switches and door frames: These frequently touched surfaces often have built-up oils and dirt
Effective Cleaning Solutions
For most walls, a solution of warm water and mild dish soap works effectively. For tougher stains or grease, consider:
- TSP (Trisodium Phosphate): Excellent for heavy-duty cleaning, especially in kitchens
- Degreasing agents: For areas with significant oil or grease buildup
- Mildew cleaners: Essential in bathrooms or areas with moisture issues common in Kansas City's humid summers
Don't Overlook the Details
Pay attention to often-forgotten areas:
- Baseboards and trim
- Door and window frames
- Light fixtures and ceiling fans
- Areas behind furniture that was just moved
Handle Minor Repairs and Wall Imperfections
While professional painters will address major wall preparation issues, handling minor repairs yourself can save time and potentially reduce costs.
Nail Holes and Small Damage
Most homes have numerous small nail holes from picture hanging and minor wall damage. You can address these with:
- Spackling compound: Ideal for holes smaller than a dime
- Paintable caulk: Perfect for small gaps around trim or baseboards
- Mesh patches: For slightly larger holes or thin spots in drywall
Apply these materials according to manufacturer instructions, allowing adequate drying time before painters arrive.
When to Leave Repairs to Professionals
Some repairs are best left to your painting professionals:
- Large holes or significant drywall damage
- Cracks that may indicate structural issues
- Water damage or staining that requires specialized treatment
- Extensive wallpaper removal
- Issues requiring primer or specialty preparation
Documenting Problem Areas
Take photos of any areas of concern and compile a list of issues you'd like the painters to address. This ensures nothing gets overlooked and helps provide accurate estimates for additional work.
Ensure Proper Access and Safety Preparation
Creating safe, accessible working conditions helps painters work more efficiently and reduces the risk of accidents or damage.
Access Considerations
Ensure painters can easily access:
The work area: Clear pathways from entry points to all rooms being painted
Utilities: Provide access to electrical outlets and water sources
Storage areas: Designate space where painters can store their equipment and supplies
Parking: Ensure adequate parking space for work vehicles, considering Kansas City's street parking regulations
Safety Preparations
While professional painters bring their own safety equipment, you can help create a safer work environment:
- Remove or secure loose rugs that could cause tripping
- Ensure adequate lighting in all work areas
- Clear stairways and hallways completely
- Secure pets in areas away from the work zone
- Inform painters of any home-specific safety considerations
Climate Control Planning
Kansas City's weather can vary dramatically, and interior conditions affect paint application and drying:
Temperature control: Maintain temperatures between 65-75°F for optimal paint performance
Humidity management: Use dehumidifiers during humid summer months or humidifiers during dry winter periods
Ventilation: Plan for adequate airflow while maintaining temperature control
Communication and Final Coordination
The final preparation step involves clear communication with your painting contractor to ensure everything is coordinated perfectly.
Pre-Project Walkthrough
Schedule a final walkthrough with your painters before work begins. This allows you to:
- Confirm all preparation work is complete
- Address any last-minute questions or concerns
- Review the scope of work and timeline
- Discuss any changes to the original plan
- Confirm paint colors and finishes
Establishing Expectations
Clear communication prevents misunderstandings:
Work hours: Confirm daily start and end times
Access requirements: Discuss how painters will enter and secure your home
Communication preferences: Establish how you'll receive updates on progress
Quality standards: Review expectations for cleanup and final results
Planning for Disruption
Even well-prepared painting projects create some disruption to daily routines. Plan accordingly:
- Arrange alternative spaces for daily activities
- Plan meals that don't require access to painted areas
- Consider temporary sleeping arrangements if bedrooms are being painted
- Schedule the project during times when disruption is minimized
Color Confirmation
Use this final preparation phase to confirm your color choices:
- Review paint samples in the actual rooms under different lighting conditions
- Consider how Kansas City's varying natural light throughout the day affects colors
- Confirm accent colors and trim treatments
- Ensure all paint products are purchased and ready for the project
Frequently Asked Questions
Q: How far in advance should I start preparing my room for painting?
Start your preparation process at least one week before your scheduled painting date. This gives you adequate time to move furniture, complete cleaning tasks, and address any minor repairs without feeling rushed. For larger projects or if you're doing extensive preparation work, consider starting two weeks in advance. This timeline also allows for any unexpected issues that might arise and gives you flexibility to adjust your schedule if needed.
Q: Should I remove all outlet covers and light switch plates myself?
Yes, removing outlet covers and light switch plates yourself is an excellent preparation step that can save time and money. Most professional painters appreciate when homeowners handle this task in advance. Use a screwdriver to carefully remove all plates and store them with their screws in labeled bags. If you're uncomfortable working around electrical components or encounter any unusual wiring configurations, leave these items for the professionals to handle safely.
Q: What should I do if I can't move large furniture pieces out of the room?
When large furniture pieces can't be removed completely, move them to the center of the room and group them together. Ensure there's at least four feet of clearance from all walls to give painters adequate working space. Cover furniture completely with high-quality drop cloths or plastic sheeting, securing the covering to prevent slipping. Professional painters are experienced working around furniture, but providing maximum space makes their job easier and often results in better quality work.
Q: How do I protect my floors during the preparation and painting process?
Choose floor protection based on your flooring type. For hardwood floors common in Kansas City homes, use canvas drop cloths which provide protection without trapping moisture. For carpeted areas, use heavy-duty plastic sheeting or specialized carpet protection film. Secure all protective materials at the edges to prevent shifting during work. Even though professional painters will bring their own drop cloths, your advance preparation provides an extra layer of protection.
Q: What cleaning should I do before painters arrive, and what should I leave for them?
Focus your cleaning efforts on removing dirt, dust, and grime from walls, especially in high-traffic areas, kitchens, and bathrooms. Clean light switches, door frames, and baseboards thoroughly. However, leave specialized cleaning tasks like removing stubborn stains, addressing mildew issues, or cleaning areas that require specific preparation products for the professionals. They have the right equipment and experience to handle these tasks as part of their wall preparation process.
Q: Should I be concerned about paint fumes, and how should I prepare my family and pets?
Modern professional-grade paints, especially those used by reputable contractors, are typically low-VOC (volatile organic compounds) and produce minimal odors. However, it's still wise to plan for adequate ventilation and consider temporarily relocating sensitive family members or pets. Discuss paint options with your contractor if you have concerns about fumes. For homes with infants, elderly residents, or individuals with respiratory sensitivities, consider scheduling the work when these family members can stay elsewhere temporarily.
Ready to Transform Your Kansas City Home?
Proper preparation is the foundation of any successful painting project, and taking these steps before your professional painters arrive ensures you'll get the beautiful, long-lasting results you're investing in. From clearing furniture and protecting surfaces to addressing minor repairs and coordinating with your contractors, each preparation step contributes to a smoother project and superior final outcome.
At KC Painting, we've been transforming Kansas City homes and businesses for years, and we've seen how proper preparation makes all the difference in achieving exceptional results. Our experienced team works with homeowners throughout Kansas City and the surrounding areas to deliver professional interior painting services that exceed expectations.
When you're ready to give your home the fresh, beautiful look it deserves, we're here to help guide you through every step of the process—from initial preparation advice to the final brushstroke. Our commitment to quality workmanship and customer satisfaction has made us a trusted choice for Kansas City residents who want their painting projects done right the first time.
Don't let another season pass with rooms that don't reflect your style and personality. Contact KC Painting today at (816) 281-7039 to schedule your free estimate and consultation. We'll work with you to plan your project timeline, discuss your color preferences, and provide expert advice on preparing your home for a transformation that will enhance your living space for years to come.
Your dream home is just a phone call away. Let KC Painting bring our professional expertise and local Kansas City knowledge to your next interior painting project.