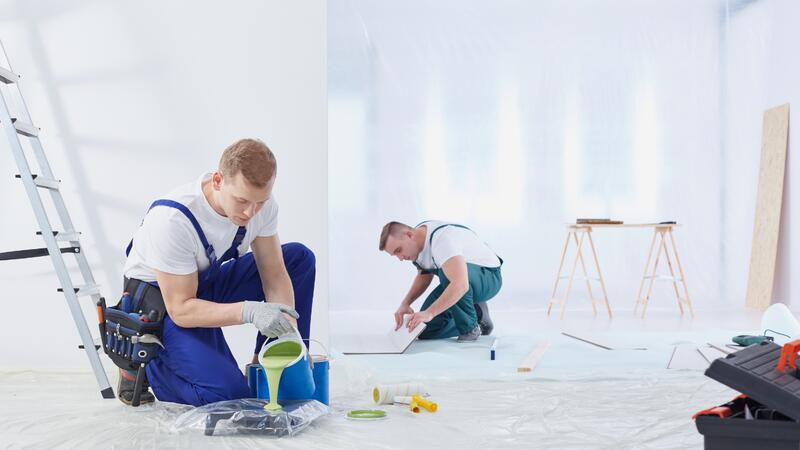
The vibrant neighborhoods of Kansas City, MO, are known for their beautiful homes, each reflecting the unique style and care of its residents. A fresh coat of exterior paint doesn't just enhance curb appeal; it’s a vital layer of protection against the unpredictable weather patterns that define our region, from harsh winter freezes to humid summer days. But before you even think about picking out that perfect shade of beige or blue, a critical, often underestimated, phase must occur: preparing your home's exterior.
Many homeowners dream of a stunning transformation, envisioning the final result. However, skipping or rushing the preparation steps is the quickest way to guarantee a short-lived, sub-par paint job that will peel, crack, and fade long before its time. Think of it this way: a beautiful cake needs a strong foundation and quality ingredients. Similarly, a durable, beautiful exterior paint job relies entirely on the thoroughness of its preparation.
This comprehensive guide will walk Kansas City homeowners through every essential step of exterior paint preparation. We'll delve into everything from the initial inspection to the final masking, ensuring your home is a pristine canvas ready to receive a long-lasting, protective finish. Whether you plan to tackle some of the prep yourself or are looking to understand the process when hiring professionals like KC Painting, this information is invaluable. Get ready to learn how to safeguard your investment and make your home the envy of the block.
Timing is Everything: When to Prepare Your Kansas City Home
The successful outcome of your exterior painting project in Kansas City hinges significantly on timing. Not only does the weather need to cooperate for the actual painting, but the preparation steps also have optimal windows. Ignoring these can lead to compromised results, making your efforts futile.
Understanding Kansas City's Climate for Painting
Kansas City's climate is characterized by four distinct seasons, each presenting unique challenges and opportunities for exterior work.
- Spring: Generally mild, with fluctuating temperatures and a good amount of rainfall. This can be ideal for cleaning and some repairs, but constant rain can delay progress. Humidity levels tend to rise.
- Summer: Hot and humid, with frequent thunderstorms. While the heat helps paint dry quickly, direct sunlight on hot surfaces can cause paint to blister or dry too fast, preventing proper adhesion. High humidity can also extend drying times for cleaning and primer.
- Fall: Often considered the "golden window" for exterior painting in Kansas City. Temperatures are usually moderate, humidity levels drop, and there's less frequent rain. This allows for excellent drying conditions for both prep work and paint application.
- Winter: Cold temperatures, freezing rain, snow, and ice make exterior painting impractical and often impossible. Most paints require temperatures above 50°F (10°C) for several days for proper application and curing.
Ideal Seasons for Exterior Painting Prep
Given Kansas City's climate, the best times to begin your exterior painting preparation are typically:
- Late Spring (May-June): Once the consistent heavy spring rains have subsided, and before the peak summer heat and humidity set in. This allows enough time for washing, scraping, and repairs without extreme temperatures. Ensure there's a good stretch of dry days for washing.
- Early Fall (September-October): This is arguably the most ideal time. The summer's heat and humidity have broken, reducing the chance of mold/mildew regrowth after cleaning, and temperatures are consistently mild enough for caulk, primer, and repairs to cure properly. It also allows sufficient time before the first hard freeze, which would halt all exterior work.
Starting your prep too early in spring might mean dealing with ongoing wetness, while delaying until late summer or early fall risks running into cooler temperatures that aren't conducive to proper paint adhesion and drying. Planning ahead ensures you have ample time to complete each step thoroughly, yielding the best possible outcome for your Kansas City home.
The Initial Assessment: A Thorough Inspection of Your Home's Exterior
Before any cleaning or repair work begins, a meticulous inspection of your home's exterior is paramount. This initial assessment helps you identify problem areas, prioritize tasks, and gather the necessary tools and materials. Skipping this step is like trying to navigate Kansas City without a map – you’ll likely get lost or miss crucial turns.
Visual Inspection: What to Look For
Walk around your entire home, taking notes or photos of anything that seems amiss. Pay close attention to:
- Peeling, Cracking, or Chipping Paint: This is the most obvious sign that old paint is failing. Note the severity and location. Is it widespread or localized? Peeling often indicates moisture issues or poor adhesion of previous layers.
- Fading and Discoloration: While not directly a structural issue, fading suggests the existing paint's UV protection is wearing thin, making it less effective against the Kansas City sun. Discoloration could indicate mildew, algae, or mineral stains.
- Chalking: When you run your hand over the surface and a fine powder comes off, this is chalking. It’s a natural process where the paint binder degrades, releasing pigment. While not always a sign of failure, excessive chalking needs thorough cleaning and possibly a specialized primer.
- Wood Rot: Inspect all wood surfaces – siding, trim, fascia boards, window sills, door frames, and deck railings. Probe any suspicious areas (soft spots, discoloration, fungal growth) with a screwdriver. Rot is a serious issue that needs to be addressed before painting, as paint won't adhere to compromised wood and will trap moisture, accelerating decay.
- Cracked or Missing Caulk: Caulk seals gaps around windows, doors, trim, and siding joints, preventing water intrusion. Cracked, shrunken, or missing caulk leaves your home vulnerable to moisture damage.
- Mildew and Algae: Green, black, or grey fuzzy patches, especially on shaded sides of the house or near gutters, are indicators of mildew or algae growth. These must be completely removed.
- Loose or Damaged Siding: Check vinyl, aluminum, or wood siding for loose panels, warping, cracks, or impact damage. Any compromised siding compromises the integrity of your exterior.
- Loose Nails or Screws: Protruding fasteners can create stress points in the paint film and allow moisture in.
- Gutter and Downspout Condition: Ensure gutters are clean and draining properly. Clogged or damaged gutters can lead to water overflowing onto siding, causing stains, mildew, and premature paint failure. Check that downspouts direct water well away from the foundation.
Structural Integrity Checks
Beyond the paint itself, assess the underlying structure.
- Foundation: Look for large cracks or settling. While painting won't fix structural foundation issues, it's good to be aware of them. Small hairline cracks might be repairable.
- Roofline and Fascia: Inspect the roof edges where they meet the walls. Look for missing shingles, damaged flashing, or signs of leaks that could be contributing to moisture problems on your siding or trim. The fascia boards (the trim covering the rafter ends) are particularly vulnerable to water damage from a failing roof or gutters.
- Window and Door Frames: Ensure these are sound and not suffering from rot or significant gaps.
Moisture Detection
Moisture is the number one enemy of exterior paint. Many paint failures can be traced back to underlying moisture problems.
- Staining: Look for water stains below windows, along siding seams, or near the foundation. These are clear indicators of water intrusion.
- Blistering Paint: Bubbles or blisters in the paint often mean moisture is trapped beneath the surface, trying to escape.
- Efflorescence: On masonry surfaces (stucco, brick), a white, powdery residue indicates salts being leached from within the material by evaporating water.
If you identify significant structural issues, widespread wood rot, or persistent moisture problems that seem beyond a simple fix, it might be wise to consult a general contractor or a moisture specialist before painting. Ignoring these foundational problems means your new paint job will be short-lived, no matter how perfectly it's applied. Taking thorough notes during this inspection phase will create a roadmap for your entire preparation process, ensuring no critical step is overlooked.
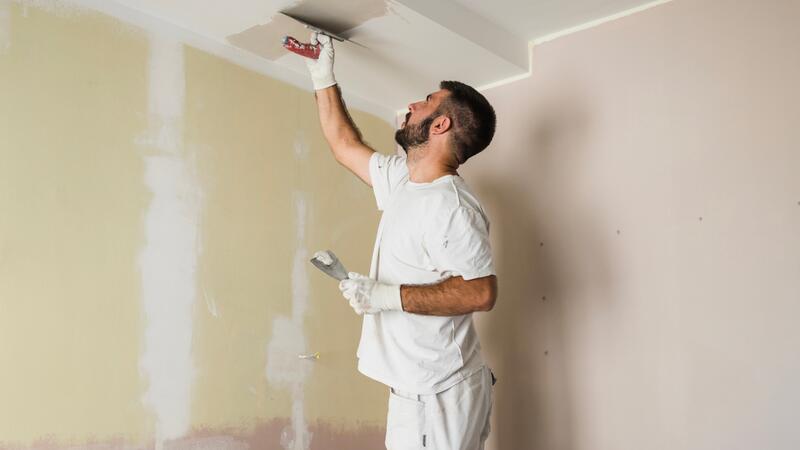
Deep Cleaning: The Foundation of a Lasting Paint Job
After your initial assessment reveals the condition of your home, the next crucial step is deep cleaning. This isn't just about making your house look tidy; it's about creating a perfectly clean, sound surface for the new paint to adhere to. Any dirt, grime, mildew, or loose particles left on the surface will act as a barrier, preventing proper adhesion and leading to premature paint failure. This step is non-negotiable for a durable paint job in Kansas City.
Why Cleaning is Non-Negotiable
Imagine trying to stick a piece of tape to a dusty, greasy surface – it won't hold. The same principle applies to paint. Paint needs a clean, dry, and dull surface to bond effectively.
- Removes Contaminants: Dust, dirt, cobwebs, pollen, bird droppings, and insect nests all prevent proper adhesion.
- Eliminates Organic Growth: Mildew, mold, and algae not only look bad but actively eat away at paint and wood. They must be killed and removed entirely.
- Ensures Even Adhesion: A clean surface allows for uniform absorption of primer and paint, leading to a smoother, more consistent finish.
- Reveals Hidden Damage: Sometimes, a layer of grime can mask smaller cracks or imperfections that become visible only after a thorough wash.
Washing Techniques: Pressure Washing vs. Hand Washing
The choice between pressure washing and hand washing depends on the type of siding, the extent of the dirt, and your comfort level.
Pressure Washing:
- Pros: Highly effective for removing stubborn dirt, grime, loose paint, and mildew quickly. It covers large areas efficiently.
- Cons: Can be very damaging if not used correctly. High pressure can force water behind siding, into cracks, under shingles, and into window seals, leading to moisture problems inside the walls. It can also strip sound paint, etch wood, and damage softer materials like stucco or old mortar.
- When to Use: Best for highly soiled surfaces, unpainted masonry, or robust siding that can withstand the pressure. Always use a wide-angle tip (e.g., 25-degree or 40-degree) and keep the nozzle moving, maintaining a safe distance (12-18 inches) from the surface. A "fan" or "feathering" technique is best.
- Cost: Pressure washer rentals typically range from $40-$100 per day. Professional pressure washing services in Kansas City often charge $200-$600, depending on house size.
Hand Washing (Soft Wash):
- Pros: Gentler and safer for all types of siding, especially older homes, delicate surfaces, and areas where water intrusion is a concern. It allows for more control and targeted cleaning.
- Cons: More labor-intensive and time-consuming for large homes.
- When to Use: Ideal for homes with delicate siding (e.g., cedar shingles, fragile stucco), homes with less severe dirt, or if you're concerned about potential damage from a pressure washer. It involves scrubbing with brushes and rinsing with a garden hose.
Best Practice for Many Kansas City Homes: A combination approach. Use a pressure washer on a low-pressure setting (like a garden hose with a sprayer, or a "soft wash" tip designed for chemicals) to apply cleaning solutions, then gently rinse. For tougher spots, a medium-bristle brush and elbow grease are often needed.
Mold, Mildew, and Algae Removal
These organic growths are common in the humid Kansas City summers and must be completely eradicated.
- Process:
- Prepare a Solution: Mix one part household bleach with three parts water, or use an oxygen bleach solution (safer for plants and colored surfaces). Commercial mildew removers are also available. Always test in an inconspicuous area.
- Apply: Spray the solution onto the affected areas. Allow it to dwell for 15-20 minutes, keeping the surface wet. For heavy growth, use a scrub brush to agitate.
- Rinse Thoroughly: Rinse the entire area with clean water using a garden hose or a low-pressure setting on a pressure washer. Ensure all traces of the solution and dead mildew are removed.
- Protect Nearby Plants: Wet down plants and shrubs with plain water before applying bleach solutions, and rinse them again immediately after you’ve rinsed the house.
Detergents and Cleaning Solutions
Beyond bleach for mildew, various detergents can help clean surfaces:
- Household Detergents: A few drops of dish soap in a bucket of water can be effective for general dirt and grime.
- Trisodium Phosphate (TSP): A powerful cleaner for heavily soiled surfaces, especially grease. Use with caution: TSP is corrosive and requires protective gear (gloves, eye protection). It must be rinsed thoroughly, as residue can interfere with paint adhesion. It's also harsh on plants.
- Exterior House Washes: Many commercially available exterior house washes are formulated to be safer for plants and specific siding types, often containing mildewcides. Follow product instructions carefully.
Important Reminders for Cleaning:
- Work in Sections: Clean your home in manageable sections, from top to bottom, to prevent streaks.
- Allow to Dry Completely: This is critical. The surface must be bone dry before any scraping, repair, or priming begins. Depending on humidity and temperature in Kansas City, this could take 24-72 hours. Moisture trapped under paint will cause blistering and peeling.
- Protect Outlets and Fixtures: Cover outdoor electrical outlets and turn off power to outdoor lights before washing.
A truly clean surface is the cornerstone of a successful exterior paint job. Taking your time and being meticulous during this phase will pay dividends in the longevity and appearance of your home's new finish.
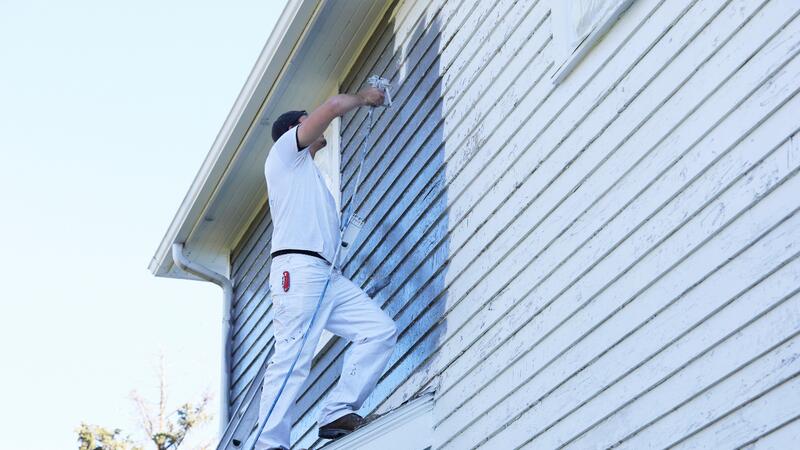
Repair and Restoration: Addressing Damage Before Paint
With your Kansas City home's exterior thoroughly cleaned and dry, it's time for the intricate work of repair and restoration. This phase is arguably the most critical for the long-term durability and aesthetic appeal of your new paint job. Painting over damaged or unstable surfaces is like putting a bandage on a broken bone – it might look better for a moment, but the underlying problem will eventually cause the "bandage" to fail.
Scraping and Removing Loose Paint
This is often the most labor-intensive part of the preparation process. Any paint that is peeling, flaking, or blistering must be removed.
- Tools: Use stiff wire brushes, paint scrapers (triangle, carbide, hook), sanding blocks, and possibly a heat gun (with extreme caution to avoid lead paint exposure or fire hazards).
- Technique: Scrape aggressively but carefully, removing all loose and failing paint down to a sound surface. Feather the edges of the remaining paint to ensure a smooth transition. For stubborn areas, a heat gun can soften the paint for easier removal, but never use it on lead-based paint (common in homes built before 1978) without proper safety precautions and containment, or professional assistance.
- Sanding: After scraping, sand any rough edges or uneven transitions to create a smooth, consistent surface. This promotes better adhesion for the new paint. Use medium-grit sandpaper (e.g., 80-120 grit) on a sanding block or power sander.
- Dust Control: Wear a dust mask, especially if dealing with older paint, and collect all paint chips. Dispose of them properly, especially if lead paint is suspected.
Repairing Cracks and Holes (Wood, Stucco, Siding)
Once loose paint is gone, address any damage to the substrate itself.
Wood Siding & Trim:
- Small Holes/Nail Holes: Fill with exterior-grade wood filler or spackle. Apply in thin layers, allowing each to dry, then sand smooth.
- Minor Cracks/Splits: Use a flexible exterior wood filler or patching compound. For deeper cracks, you may need to pre-fill with caulk or an epoxy filler.
- Dents/Divots: Fill with wood filler, sand smooth.
Stucco:
- Hairline Cracks: Can often be filled with an elastomeric caulk specifically designed for stucco or a flexible acrylic patch compound.
- Larger Cracks/Holes: Requires stucco patching material. Clean out the crack, apply a bonding agent (if recommended by the patch material), then apply the patch, matching the existing texture as closely as possible. This is a skill that may be best left to professionals like KC Painting for seamless results.
Fiber Cement Siding:
- Small Holes/Chips: Can often be filled with an exterior-grade patching compound or caulk, then sanded.
- Cracks: Depending on severity, may require a specialized fiber cement patch or, for large cracks, replacement of the damaged board.
Vinyl/Aluminum Siding:
- Cracks/Small Holes: Can sometimes be repaired with specialized vinyl/aluminum repair kits or patching compounds, though color matching can be difficult if not painting. If you are painting, patching becomes much easier.
- Dents/Warps: Severely dented aluminum siding may need replacement. Warped vinyl siding often points to heat damage or improper installation and may also require replacement sections.
Replacing Damaged Siding or Trim
When damage is too extensive for repair, replacement is the only option.
- Wood Rot: If probing reveals soft, crumbling wood, it needs to be cut out and replaced. For small, localized areas, you might be able to use a two-part epoxy wood consolidant and filler system. For larger sections of rot on trim or siding, the entire piece should be replaced with new, treated wood or a rot-resistant composite material. Ensure replacement pieces match the existing profile.
- Severely Cracked/Warped Siding: Whether wood, fiber cement, or vinyl, severely compromised panels should be removed and new ones installed. This ensures a stable and visually consistent surface for painting.
Addressing Wood Rot and Pest Damage
Wood rot is a fungal infection that thrives on moisture. It needs to be thoroughly removed.
- Identification: Soft, spongy wood, discoloration, or even visible fungal growth.
- Remedy: Cut out all rotted wood until you reach sound, dry wood. Treat the surrounding area with a wood hardener or borate solution to kill any remaining spores and prevent future growth. Then, fill with an epoxy wood filler or replace the entire section.
- Pest Damage: If you find evidence of termites, carpenter ants, or other wood-boring insects, address the infestation first. Pest control professionals should be consulted. Once the pests are gone, repair or replace the damaged wood as needed.
Caulking and Sealing: The Moisture Barrier
Caulking is your home's first line of defense against moisture intrusion. It's often overlooked but critical.
- Remove Old Caulk: Scrape out old, cracked, or failing caulk using a caulk removal tool. Ensure the joint is clean and dry.
- Choose the Right Caulk:
- Acrylic Latex Caulk (with Silicone): Good for general purpose, paintable, flexible. Good for sealing gaps around windows, doors, trim.
- Elastomeric Caulk: Highly flexible, ideal for areas with significant movement or larger gaps, and for stucco.
- Polyurethane Caulk: Very durable and flexible, but can be harder to work with and might require mineral spirits for cleanup. Excellent for high-movement joints or dissimilar materials.
- Siding-Specific Caulk: Some products are formulated specifically for fiber cement or other siding types.
- Application: Cut the caulk tube nozzle at a 45-degree angle to match the size of the gap. Apply a continuous bead of caulk with a steady hand and consistent pressure. Smooth the bead with a wet finger, a caulk tool, or a wet sponge for a clean, weather-tight seal. Pay attention to all joints, corners, and penetrations.
Gutter and Downspout Maintenance
Often considered a separate task, proper gutter maintenance directly impacts your paint job's longevity.
- Clean Gutters: Remove leaves, debris, and sludge. Clogged gutters overflow, directing water over your siding, leading to streaks, mildew, and premature paint failure.
- Repair/Replace: Ensure gutters are properly sloped and securely fastened. Repair any leaks or damaged sections. Downspouts should direct water several feet away from the foundation.
This repair and restoration phase is where the true craftsmanship of a painting project lies. It's time-consuming and demands attention to detail. Cutting corners here will guarantee a shorter lifespan for your beautiful new paint. If you're overwhelmed by the extent of repairs or lack the specialized tools and expertise, calling KC Painting for their professional preparation and painting services is a smart investment.
Priming for Success: Creating the Perfect Canvas
After all the cleaning, scraping, and repairs are complete, your Kansas City home is nearly ready for its final transformation. The next critical step, often underestimated or skipped by DIYers, is priming. Priming is not just an extra layer; it's a foundational component that profoundly impacts the durability, adhesion, and appearance of your finished paint job.
When and Why to Prime
Think of primer as the bridge between your prepared surface and the topcoat of paint. It serves several vital functions:
- Enhances Adhesion: Primer creates a uniform, microscopically "toothy" surface that allows the topcoat to bond much more strongly than it would to bare wood, old paint, or patched areas. This significantly reduces the risk of peeling and blistering.
- Seals Porous Surfaces: Bare wood, stucco, and new patches are highly porous. Primer seals these surfaces, preventing them from "sucking up" the first coat of paint, which would lead to an uneven finish and require more topcoats.
- Blocks Stains and Bleed-Through:
- Tannin Bleed: Bare redwood, cedar, and some types of treated lumber contain natural tannins that can bleed through light-colored paints, causing yellow or brown stains. Stain-blocking primers prevent this.
- Knots: Knots in wood can cause sap to bleed through. Shellac-based or specialized stain-blocking primers are essential here.
- Water Stains: If you had previous water damage, a good primer will lock in those stains, preventing them from reappearing through the new paint.
- Improves Topcoat Appearance: Primer provides a uniform color and sheen base, allowing the topcoat to achieve its true color and a consistent finish. It also helps achieve full coverage with fewer topcoats.
- Provides Uniform Absorption: When you have a mix of surfaces (bare wood, old paint, new patch material), each will absorb paint differently. Primer evens out this absorption, preventing "flashing" (uneven sheen) and ensuring a professional-looking finish.
- Mildew Resistance: Many exterior primers contain mildewcides, adding an extra layer of protection against the humid Kansas City climate.
When You Must Prime:
- Bare Wood: Always prime bare wood, especially cedar or redwood to prevent tannin bleed.
- New Construction or Major Repairs: Any new siding, trim, or patched areas need primer.
- Chalky Surfaces: After cleaning, if the old paint is still slightly chalky, a bonding primer can help.
- Stained Surfaces: Water stains, rust stains, or tannin bleed areas.
- Color Change: If you're drastically changing the color (e.g., from dark to light), a tinted primer can help achieve coverage with fewer topcoats.
- Fiber Cement Siding: New fiber cement almost always requires a high-quality acrylic primer.
- Ferrous Metals: For iron or steel components, use a rust-inhibiting metal primer.
Types of Primers for Different Surfaces
Choosing the right primer is as important as choosing the right paint.
- Oil-Based (Alkyd) Primers:
- Pros: Excellent stain-blocking capabilities (tannins, water stains), good adhesion to chalky surfaces, and often preferred for bare wood due to their ability to penetrate and seal. Offer good rust inhibition on metal.
- Cons: Slower drying time, strong odors, cleanup requires mineral spirits. Less flexible than acrylics, so they can become brittle over time.
- Best For: Bare wood (especially cedar, redwood), oil-based paints, heavily stained surfaces, ferrous metals.
- Latex (Acrylic) Primers:
- Pros: Fast drying, low odor, easy water cleanup, excellent flexibility (resists cracking), good for a variety of surfaces. Many contain mildewcides, ideal for Kansas City's humidity.
- Cons: Generally not as good at blocking severe stains as oil-based, and may not adhere as well to extremely glossy or chalky surfaces without proper prep.
- Best For: Most general exterior applications, new fiber cement siding, previously painted surfaces (sound), masonry, aluminum/vinyl siding.
- Shellac-Based Primers:
- Pros: Exceptionally fast drying, superior stain-blocking (knots, severe water damage, smoke damage), adheres well to almost any surface (glossy, greasy, chalky).
- Cons: Very strong odor, cleanup requires denatured alcohol, less flexible, more expensive.
- Best For: Spot priming knots or severe stains, often reserved for interiors due to cost and flexibility concerns, but indispensable for specific exterior issues.
Specific Primer Recommendations:
- Bare Wood (cedar/redwood): High-quality oil-based stain-blocking primer.
- Fiber Cement/Composite Siding: High-quality acrylic latex primer designed for these materials.
- Aluminum/Vinyl Siding: A bonding acrylic latex primer.
- Masonry/Stucco: Acrylic masonry primer to seal and provide a uniform base.
- Heavily Repaired Areas: Spot prime all patches and bare spots with an appropriate primer, even if you plan to full-coat primer later.
Application Techniques for Priming
- Read the Label: Always follow the manufacturer's instructions for mixing, application, and drying times.
- Surface Preparation: Ensure the surface is completely clean, dry, and free of dust before priming.
- Application Tools: Use high-quality brushes, rollers, or an airless sprayer, similar to how you would apply paint.
- Coverage: Apply primer evenly. Don't apply it too thick, as this can lead to cracking. Aim for uniform coverage over all prepared areas.
- Drying Time: Allow the primer to dry completely according to manufacturer specifications, typically 1-4 hours for latex, 24 hours for oil, before applying the topcoat. Rushing this will compromise adhesion.
- Spot Priming vs. Full Priming: If only small areas of bare substrate were exposed during scraping and repair, you can "spot prime" just those areas. However, for a complete color change, significant repairs, or an entire house with bare siding, a full coat of primer over the entire exterior is highly recommended for the best results and longest lasting finish.
Investing the time and effort into proper priming is a non-negotiable step for any successful exterior paint job in Kansas City. It's the silent hero that ensures your chosen topcoat looks its best and performs flawlessly for years to come.
Protecting Your Landscape and Fixtures
With all the cleaning, repairs, and priming complete, your Kansas City home is a pristine canvas. Now, the final stage of preparation before the first drop of topcoat paint is applied is safeguarding all the areas you don't want painted. This meticulous step prevents accidental paint splatters, overspray, and damage to your beloved landscaping, ensuring a clean, professional finish and minimizing frustrating cleanup later.
Covering Plants and Shrubs
Your beautiful garden and landscaping can easily become victims of stray paint droplets or overspray, especially when using an airless sprayer.
- Tarps and Drop Cloths: Lay down canvas or plastic drop cloths around the base of your home, extending several feet out from the foundation. Canvas is preferred over plastic for longer jobs as it's less slippery, more durable, and absorbs spills rather than letting them run. Secure the edges with rocks, bricks, or stakes to prevent them from blowing away.
- Plastic Sheeting: For larger shrubs or delicate plants, gently drape plastic sheeting over them. Be careful not to break branches. Anchor the plastic at the base to prevent wind from blowing it off and exposing the plants. For very hot days in Kansas City, consider using breathable tarps or removing plastic after painting each section to prevent plants from "cooking" under the plastic.
- Trim Back: For plants or vines growing too close to the house, it's often wise to trim them back a few inches. This provides adequate working space and prevents them from brushing against wet paint.
- Walkways and Patios: Cover concrete walkways, patios, and decks with drop cloths. Use painter's tape to secure them along edges if needed.
Taping Off Windows, Doors, and Light Fixtures
Achieving crisp, clean lines around these elements is crucial for a professional look.
- Painter's Tape: Invest in high-quality painter's tape (e.g., FrogTape, 3M ScotchBlue). Cheap tape can leave residue, pull off paint, or allow bleed-through. Choose a tape appropriate for the surface and removal time (e.g., 14-day or 21-day tape).
- Windows:
- Glass: Apply tape meticulously along the edge of the window panes where they meet the trim or muntins. For larger windows or sashes, you can often cover the entire glass pane with plastic sheeting or builder's paper, secured with tape.
- Frames/Sills: Tape off any part of the frame or sill that you don't want painted, such as aluminum sills, vinyl frames, or parts of the window itself if you're only painting the exterior trim.
- Doors:
- Hardware: Remove doorknobs, knockers, and deadbolts if possible. If not, tape meticulously around them.
- Hinges: Tape over hinges, or unscrew them and paint around them.
- Weatherstripping/Seals: Be careful not to paint over rubber weatherstripping. Tape it off.
- Thresholds: Protect door thresholds with tape and drop cloths.
- Light Fixtures & Outlets:
- Removal: Ideally, unmount light fixtures, security cameras, and outlet covers from the wall. Turn off power to any exterior outlets at the breaker box before touching them.
- Taping: If removal isn't feasible, tape around the base of fixtures and outlet covers with precision. You can also cover them completely with plastic bags secured with tape.
- Other Fixed Elements:
- Vents: Cover dryer vents, attic vents, and utility meters.
- Hose Bibs: Tape around outdoor faucets.
- Electrical Conduits/Pipes: Protect any exposed electrical conduit or plumbing pipes that aren't meant to be painted.
- Stone/Brick Accents: If your home has stone or brick accents that aren't being painted, tape along the paint line to prevent overspray.
Tips for Taping:
- Clean Surface: Ensure the surface is clean and dry before applying tape for optimal adhesion.
- Press Firmly: Press the tape down firmly along its entire length to create a tight seal and prevent paint from bleeding underneath. A putty knife or dedicated tape applicator can help.
- Remove Promptly: Remove painter's tape while the paint is still slightly wet (but not tacky) to get the cleanest lines and prevent the paint from peeling along with the tape. If the paint is completely dry, score along the edge of the tape with a utility knife before pulling to prevent lifting.
Removing Obstacles: Shutters, Hardware, Decor
For the most professional and durable finish, remove anything that can be detached.
- Shutters: Unscrew and remove all exterior shutters. This allows for thorough cleaning, repair, and painting of both the shutters themselves and the siding behind them. It also prevents paint buildup where the shutters meet the house.
- House Numbers/Mailboxes: Remove house numbers, wall-mounted mailboxes, and any decorative plaques or signs. This ensures paint coverage behind them and prevents unsightly paint lines or overspray on the items.
- Downspouts: While often painted, removing downspouts allows you to paint the wall behind them and ensure better coverage of the downspouts themselves. Reattach them once the paint is dry.
- Hose Reels/Garden Decor: Take down anything hanging on the house, including hose reels, thermometers, wind chimes, and other wall decor.
This stage of meticulous protection takes time and patience, but it's an investment that pays off in a dramatically cleaner, more professional-looking paint job for your Kansas City home. Skimping on protection leads to sloppy lines, paint on unwanted surfaces, and hours of tedious, frustrating cleanup that could have been avoided.
DIY vs. Professional: Knowing When to Call KC Painting
Preparing your Kansas City home for exterior painting is a monumental task, demanding time, specific tools, expertise, and a significant amount of physical effort. While a do-it-yourself approach can save on labor costs, it’s crucial to honestly assess whether it's the right choice for your project. Sometimes, the smart move is to recognize the value a professional painting contractor like KC Painting brings to the table.
Assessing Your Skill Level and Time Commitment
Before you commit to DIY, ask yourself these questions:
- Do you have the time? Exterior prep alone can take days, if not weeks, for an average-sized Kansas City home, especially if significant repairs are needed. Do you have consistent, uninterrupted blocks of time to dedicate to the project, allowing for proper drying times between steps?
- Do you have the tools and equipment? This includes ladders (extension, multi-position), scaffolding, pressure washers, various scrapers, sanders, brushes, caulk guns, and safety gear (gloves, eye protection, respirators). Renting or purchasing these adds to your overall cost.
- Are you comfortable with heights? Working on ladders and scaffolding, especially on a multi-story home, requires a steady hand and no fear of heights. Safety is paramount.
- Do you have the necessary skills? Can you accurately identify and repair wood rot, properly caulk, effectively scrape and sand, and prepare surfaces to a professional standard? Incorrect prep can lead to premature paint failure.
- Are you physically able? The work is strenuous, involving climbing, bending, scrubbing, and long hours in various weather conditions.
For many Kansas City homeowners, especially those with busy schedules, physical limitations, or complex homes, the answer to these questions might lean towards needing professional help.
Benefits of Professional Prep and Painting
Hiring a reputable local company like KC Painting offers several distinct advantages:
- Expertise and Experience: Professional painters have years of experience identifying and addressing specific types of exterior damage, understanding paint chemistry, and knowing the best products and techniques for Kansas City's climate. They can spot hidden issues a DIYer might miss.
- Efficiency: Professionals work faster and more efficiently. They have the right tools, specialized equipment, and trained crews to complete the job in a fraction of the time it would take a homeowner.
- Quality Workmanship: A professional paint job includes meticulous preparation, precise application, and clean lines. This translates to a superior, longer-lasting finish that significantly enhances your home's curb appeal and value. KC Painting prides itself on delivering high-quality, durable results.
- Proper Equipment: Professionals arrive with all the necessary ladders, scaffolding, pressure washers, sprayers, and safety gear. You don't have to worry about renting, buying, or storing expensive equipment.
- Safety: Exterior painting, especially on two-story or taller homes, involves significant safety risks. Professionals are trained in ladder safety, fall prevention, and proper handling of tools and chemicals. They are insured, protecting you from liability in case of an accident.
- Warranty/Guarantee: Reputable painting contractors, like KC Painting, stand behind their work with warranties, providing peace of mind and protection for your investment.
- Product Knowledge: They know which primers, paints, and sealants perform best for specific substrates and local weather conditions in Kansas City, ensuring optimal protection and longevity.
- Cleanup and Disposal: Professionals handle all cleanup, including the proper disposal of paint chips, old caulk, and empty paint cans, saving you time and effort.
Understanding the Investment
While professional painting services involve a higher upfront cost than a DIY approach, it's an investment in your home's longevity and value.
- Cost Breakdown: Exterior painting costs in Kansas City can vary widely based on house size, complexity (number of stories, intricate trim), current condition (how much prep is needed), and the quality of materials chosen. Expect costs to range anywhere from $3,000 for a small, simple ranch home to $15,000+ for a large, multi-story, detailed home with extensive repairs. Remember, a significant portion of this cost (often 60-80%) goes towards labor for the critical preparation steps.
- Value and Longevity: A professionally prepared and painted home will typically look better and last significantly longer (often 7-10+ years, sometimes more with quality products and excellent prep) than a DIY job, potentially saving you money in the long run by delaying the next repaint. It also enhances resale value.
- Peace of Mind: Knowing your home is protected by a high-quality, warrantied paint job from a trusted local contractor provides immense peace of mind.
Ultimately, the decision to DIY or hire a professional painter hinges on your comfort level, available time, skill set, and budget. If you value expert craftsmanship, efficiency, safety, and a long-lasting, beautiful finish without the stress and physical demand, then entrusting your Kansas City home to experienced professionals like KC Painting is an investment that truly pays off.
Frequently Asked Questions
Understanding the complexities of exterior painting in Kansas City can raise many questions. Here are some of the most common inquiries we receive from homeowners, along with expert insights.
How long does exterior paint last in Kansas City?
The lifespan of exterior paint on a Kansas City home varies significantly based on several factors:
- Quality of Paint: Premium paints typically last 7-10+ years, while lower-quality paints may only last 3-5 years.
- Quality of Preparation: This is arguably the most crucial factor. A meticulous prep job (cleaning, scraping, repairing, priming) can extend paint life by several years.
- Climate Exposure: The harsh Kansas City climate, with its hot, humid summers, freezing winters, and strong sun exposure, can accelerate paint degradation. Surfaces facing south or west often fade and fail faster.
- Siding Type: Paint tends to last longer on smoother, less porous surfaces like aluminum or vinyl siding (if painted) compared to rough-sawn wood or stucco, which can absorb more moisture.
- Number of Coats: Two topcoats over a properly primed surface generally provide better durability and color retention than a single coat. With proper prep and high-quality materials, you can expect a good exterior paint job to last 7 to 10 years or even longer in Kansas City.
What's the best time of year to paint a house in Kansas City?
The ideal time for exterior painting in Kansas City is during periods of moderate temperatures and low humidity, which allows paint to dry and cure properly.
- Late Spring (May-June): Offers good temperatures, but can have unpredictable rain. Good for prep work, but painting requires monitoring forecasts closely.
- Early to Mid-Fall (September-October): Often considered the best time. Temperatures are usually mild (50-75°F), humidity drops, and there's generally less rain than spring. This provides excellent drying conditions.
- Summer (July-August): While tempting, the high heat and humidity can be problematic. Paint can dry too quickly on the surface, leading to blistering, or humidity can extend curing times. Painters often start early in the morning and avoid painting in direct, intense midday sun. Avoid painting when temperatures are below 50°F or above 90°F, or when there's a strong chance of rain, fog, or heavy dew within 24-48 hours of application.
Can I paint over peeling paint?
No, absolutely not. Painting over peeling paint is one of the biggest mistakes a homeowner can make and will guarantee a short-lived, failing paint job. New paint will not adhere to loose, unstable old paint. It will simply peel off along with the old layers, often within months. All peeling, flaking, or blistering paint must be scraped, sanded, and removed down to a sound, well-adhered surface (or bare substrate) before any new paint or primer is applied. This thorough scraping and preparation is a critical step that professional painters like KC Painting never skip.
What kind of paint should I use for my Kansas City home?
For exterior painting in Kansas City, a high-quality acrylic latex paint is almost always the recommended choice for most surfaces (wood, fiber cement, stucco, vinyl/aluminum).
- Durability and Flexibility: Acrylic latex paints are highly flexible, allowing them to expand and contract with temperature changes without cracking, which is crucial for the varying Kansas City climate.
- Breathability: They "breathe" better than oil-based paints, allowing trapped moisture to escape, reducing blistering.
- Color Retention: High-quality acrylics offer excellent UV resistance, helping colors stay vibrant longer and resist fading in the strong Kansas City sun.
- Mildew Resistance: Many formulations include mildewcides, an important feature for our humid summers.
- Ease of Use & Cleanup: They are water-soluble for easy cleanup and dry faster. While oil-based paints still have specific uses (e.g., priming bare wood with tannin bleed, painting metal), modern premium acrylic latex paints have largely surpassed them for general exterior applications due to their superior performance characteristics and environmental benefits. Always choose a product specifically formulated for exterior use and the type of surface you are painting.
How do I choose the right color for my exterior?
Choosing an exterior paint color involves several considerations to ensure it complements your home and neighborhood in Kansas City:
- Architectural Style: Certain colors enhance specific architectural styles (e.g., historical homes might lean towards traditional palettes, modern homes towards bolder or minimalist hues).
- Fixed Elements: Consider your roof color, brick or stone accents, pathways, and landscaping. These "fixed" elements have existing colors that should harmonize with your new paint.
- Neighborhood Context: While you want your home to stand out, it should also blend aesthetically with the surrounding homes in your Kansas City neighborhood.
- Light Exposure: Colors appear differently in various lighting conditions. Get large swatches and observe them throughout the day and in different weather.
- Undertones: Pay attention to the subtle undertones of colors. A "grey" might have blue, green, or even purple undertones that become more apparent in certain lights.
- Homeowner's Association (HOA): Check if your HOA has any restrictions or approved color palettes.
- Professional Consultation: Many painting companies, including KC Painting, offer color consultation services to help you make the best choice. They can provide digital renderings or large sample boards to visualize the outcome.
How much does exterior house painting cost in Kansas City?
The cost of exterior house painting in Kansas City can vary widely, but here's a general breakdown:
- Small (1,000-1,500 sq ft) ranch-style home with minimal prep: $3,000 - $6,000
- Medium (1,500-2,500 sq ft) two-story home with moderate prep: $6,000 - $10,000
- Large (2,500-4,000+ sq ft) multi-story home with extensive prep and intricate details: $10,000 - $18,000+ These figures are estimates and depend heavily on:
- Scope of Work: The amount of scraping, sanding, repairs, and caulking needed. Extensive prep significantly increases labor costs.
- Number of Stories: Taller homes require more time, specialized equipment (taller ladders, scaffolding), and safety measures.
- Surface Material: Painting brick, stucco, or highly detailed trim can be more labor-intensive than flat siding.
- Paint Quality: Higher-grade paints cost more but offer better durability and longevity.
- Number of Colors: Using multiple trim colors or accent colors adds complexity and time. Always get a detailed, written estimate from a reputable painting contractor like KC Painting that clearly outlines the preparation steps, materials, and scope of work included.
Is pressure washing always necessary before painting?
While pressure washing is highly effective for cleaning and removing loose debris, it's not always necessary, nor is it always the best option.
- When it's good: For heavily soiled homes, unpainted masonry, or robust siding that can withstand the pressure. It's excellent for removing stubborn dirt, mildew, and chalking.
- When caution is needed (or avoid):
- Delicate or Older Siding: High pressure can damage cedar shingles, fragile stucco, or loose siding, forcing water into cracks or behind the siding, leading to moisture problems.
- Lead Paint: If your home was built before 1978 and likely has lead-based paint, pressure washing can atomize lead particles, creating a significant health hazard. In such cases, a professional with lead-safe practices is required.
- Alternative: For many homes, a thorough hand-washing or a "soft wash" with a garden hose and a mild detergent/bleach solution, followed by scrubbing, is safer and just as effective. Ultimately, the goal is a perfectly clean and dry surface. Whether that's achieved with high-pressure, low-pressure, or hand washing depends on your home's specific condition and siding type. Professional painters will assess this and choose the most appropriate method.
The exterior of your Kansas City home is more than just a surface; it's a protective shield, a statement of style, and a significant investment. Preparing it meticulously for painting season isn't just an option—it's the bedrock of a long-lasting, beautiful finish. By understanding each step, from initial inspection and deep cleaning to repairs, priming, and protection, you ensure that your new paint job will stand up to the unique challenges of our local climate and enhance your home's curb appeal for years to come.
While the DIY route can be tempting, the sheer scope and detail of proper exterior preparation often make it a daunting task for homeowners. For a flawless finish, guaranteed longevity, and the peace of mind that comes with expert craftsmanship, trusting the professionals is often the wisest choice.
Ready to give your home the fresh look and robust protection it deserves? Don't tackle this extensive project alone. The expert team at KC Painting is here to handle all your exterior painting needs, from meticulous preparation to the final stroke. We understand the specific demands of Kansas City homes and are committed to delivering exceptional quality and lasting beauty.
Contact KC Painting today for a free estimate and let us transform your home with a professional touch. Call us at (816) 281-7039.